Tips on Typesetting in Microsoft Word
Note: This article is automatically translated, please turn to the Chinese version for more accurate expression if possible.
The final paper is completed in Word, here is a summary of how I used Word to achieve some relatively complex typesetting requirements.
Automatic numbering and references
Chapter title
First look at the title requirements:
- First level heading: bold number three, bold
- Secondary heading: bold number four, bold
- Level three headings and the following headings: small four in black, bold
There is a space between the serial number and the title. The first-level serial number and title are centered; the second-level serial number and the top box of the title; the third-level and below titles “first line indentation” 2 characters. The number of the first-level heading is Chapter x, and the other headings are numbered x.y.z.
Open Home -> Paragraph -> Multilevel List, here you can modify the above heading style.
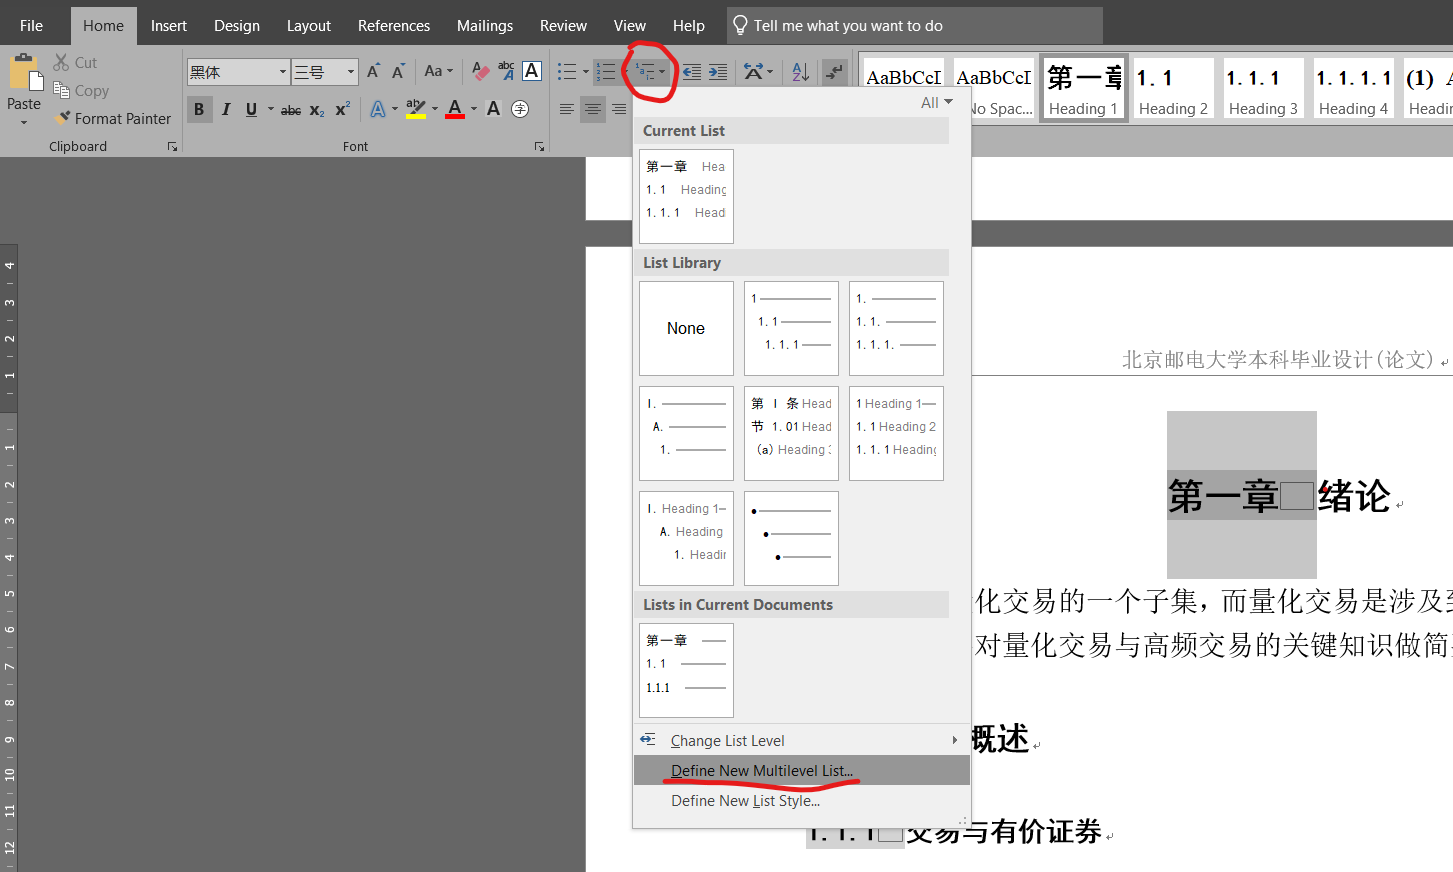
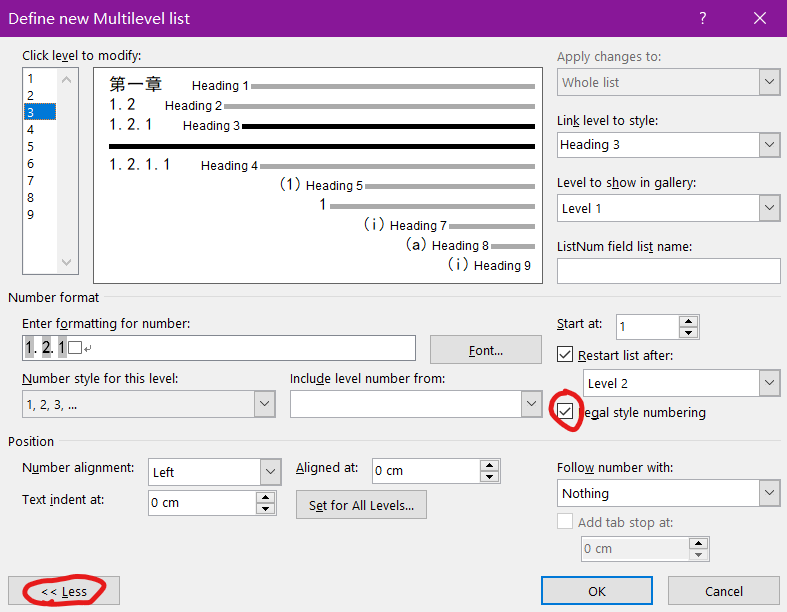
Choose one, two, three (simplified) for the numbering style of the first-level heading, and change the above format to No.One Chapter, followed by a full-width space as required. Headings of level two and below are made in the same way, and the number of the previous heading is included in the number. It should be noted that when the first-level heading is included in the more advanced headings, it will become a funny style like “一.1.2”. At this time, click More » in the lower left corner, and check the Legal style numbering in the middle right corner. That’s it.
After that, click OK, type out the title and apply the Heading style (Home -> styles -> Heading x), and Word will automatically recognize and number it.
chart
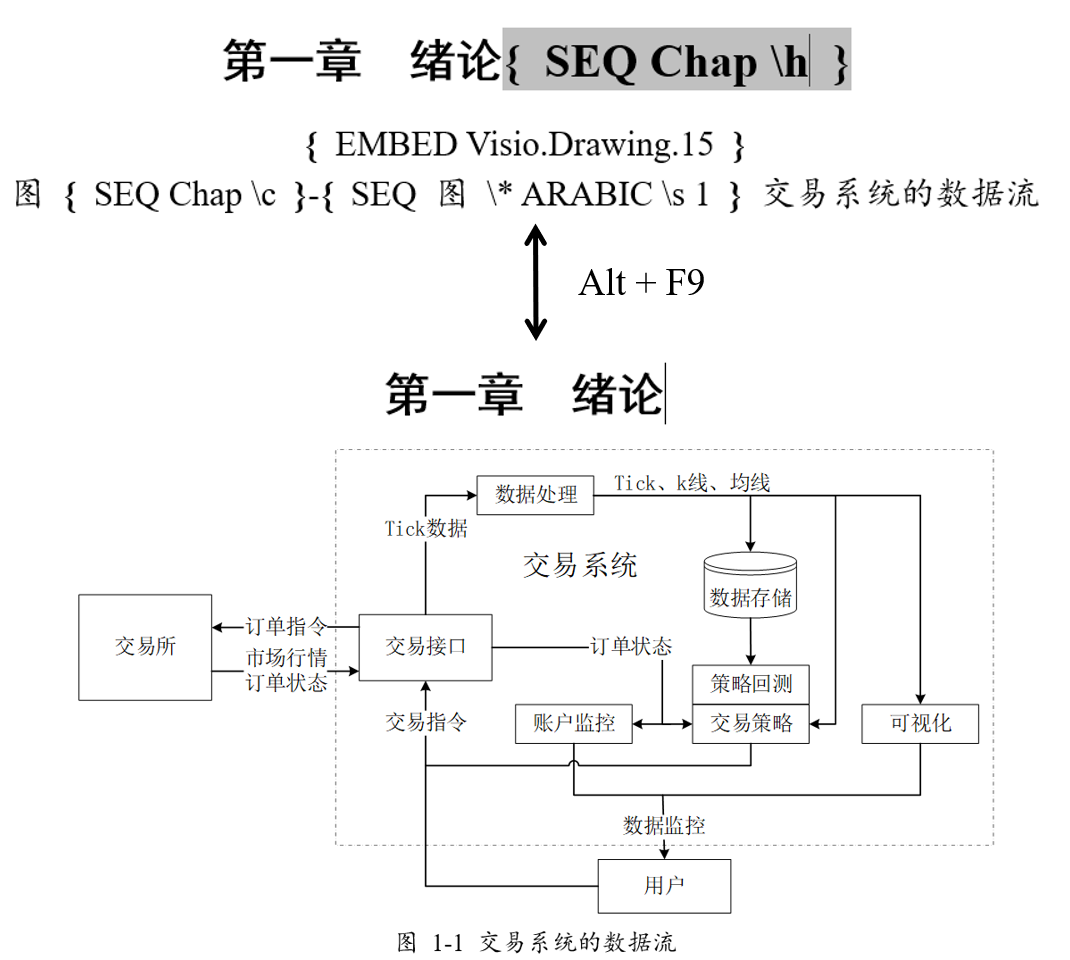
After inserting the chart, right-click Insert Caption to insert the chart title. Create a new “Figure” for the Label. However, because the first-level title number is in Chinese, only Figure 1-1 can be displayed. What we want is Figure 1-1, but Word does not provide the Legal style numbering option for the chart title. After searching, someone gave a solution to this problem (link), in fact, the automatic numbering of the chart title is only an application of the field code. Press Alt + F9 to switch between the display field code/display code result state. Just define a variable in the title of each chapter, and then use this variable as the basis for numbering.
This is the default chart title field code:
图 { STYLEREF 1 \s }-{ SEQ Figure \* ARABIC \s 1 } 图名
We define Chap at the title of each chapter (operate in the Alt+F9 state, insert the field code through Insert -> Quick Parts -> Field):
{ SEQ Chap \h }
Then change the chart title to:
图 { SEQ Chap \c }-{ SEQ Figure \* ARABIC \s 1 } 图名
You can achieve normal numbering. Then the new chart title can directly copy the above one, and then right-click on the number number -> Update Field to update the number in this place.
One thing to note is that if the changes to the chart cause the figures in many places to be updated, you do not need to right-click on each one to update, just Ctrl + A to select the entire document and press F9.
Quote
Here’s how to cite numbered objects, including chapters, charts, and references (references are the last list). Place the cursor where you want to insert, select Insert -> Links -> Cross-reference to open the cross-reference box.
To quote a chapter, select Heading in the Reference Type in the upper left corner, and the reference icon can also select the corresponding type. References do not have a specific category, just select Numbered Item.
Like icons, when the reference number changes and needs to be updated, a single change can be directly updated by right-clicking. When many references need to be updated, use Ctrl + A to select all and then press F9.
page number
Insert the page number via Insert -> Footer. As required, use different styles of footers for abstract, table of contents, and main text. Take the separation of abstract and table of contents as an example, after inserting a section break through Layout -> Breaks -> Next Page, double-click the footer on the page of the table of contents to enter the footer editing mode, and click Design -> Navigation -> Link to Previous to cancel the page The association of the feet with the previous section.
table of Contents
Select References -> Table of Contents -> Custom Table of Contents where you need to insert the table of contents to open the table of contents style panel, click Modify to modify the level of the table of contents display and the style of each level, as well as the page number and the point between the title and the page number Style, and finally click OK to insert the catalog.
Make good use of style
Many styles have been predefined in Word, such as headings at all levels, body text, and chart headings. In the actual editing, do not manually set the styles of “Song Ti, Xiao Si” for each paragraph, and directly apply the “Body” style. In this way, when modifying the style, you only need to right-click Modify on the corresponding style in Home -> Style to modify this style, and it will take effect for all contents.
Mathematical formula
I am used to the mathematical grammar of LaTeX, and then use the Equation in Word to edit the mathematical formulas. It will take a long time to enter a $\alpha$ in the symbol table. Fortunately, there is a Chrome plug-inLaTeX2Word-Equation , Paste the LaTeX math code into the input box of any page in the browser, select it, right-click LaTeX2Word-Equation to put the corresponding Word format formula on the clipboard, and paste it directly in Word, which is very convenient.
Fake code
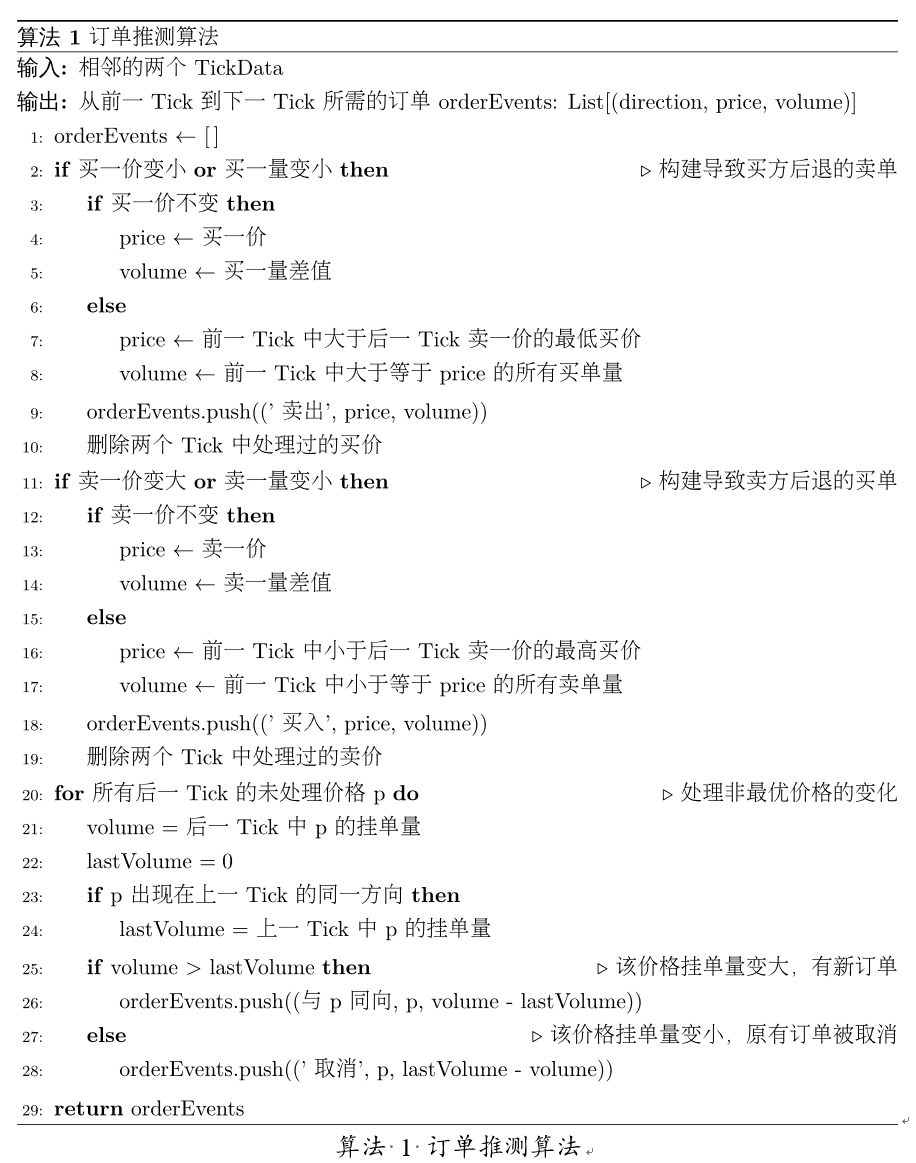
Word does not provide pseudo code editing function (analogous to the LaTeX algorithmicx macro package), so I looked around and decided to use LaTeX to complete it. Directly edit the pseudo code to be inserted in OverLeaf, export the PDF, and use InkScape to convert it into SVG and insert it into Word locally. No screenshots are needed because the vector graphics are scaled without distortion. Edit the link of Chinese pseudocode in OverLeaf:🔗 。
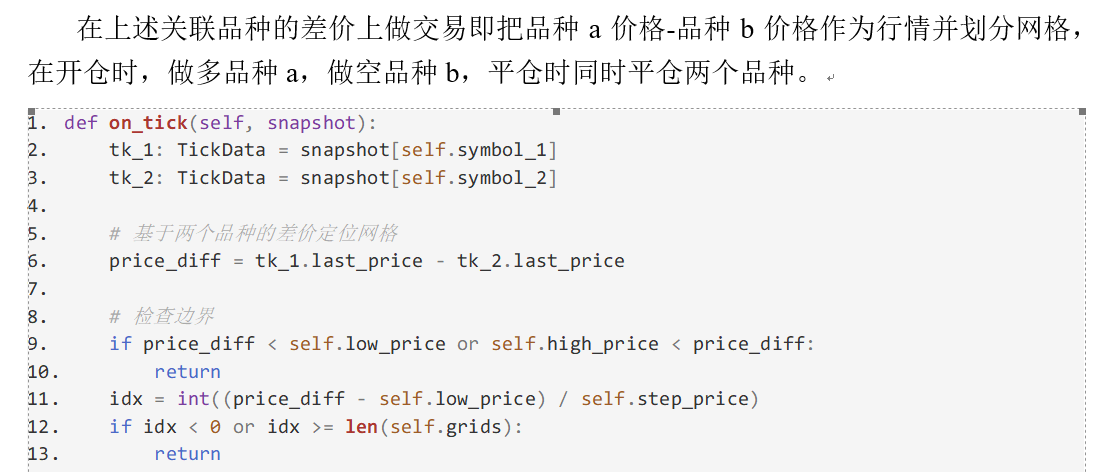
Code
It is also troublesome to insert code with line numbers and highlighting. My solution is to select OpenDocument Text in the Insert -> Text -> Object -> Object panel, and then an editing window for the child Word document will pop up, here set the four margins to 0, and copy the code in VSCode (It is recommended to use the Quiet Light color theme) and paste it into the document. This solves the problem of code highlighting. As for numbering, select all the codes and click Home -> Paragraph -> Numbering to apply the numbering list. There is no problem with the number of lines.
other
Finally, talk about a little knowledge.
Check Show all formatting marks in File -> Options -> Display to display all blank characters and control characters, which can help solve many incurable diseases and help understand how Word is formatted.
When I write markdown, I am used to inserting spaces between Chinese and English because it looks better when rendered. Word has automatically helped to deal with this, that is, increasing the space between Asian text and Latin text to make it look more beautiful, and LaTeX also has this feature.
The Times New Roman and Times New Roman required by the Bishe paper are two typical serifs, with decorative shapes at the corners of the lines, which look more delicate and beautiful. The black body is a typical sans serif, with straight lines and no decoration at the end, making it more efficient to read.